
Theme Editor
The Theme Editor allows you to easily create a custom theme for your dashboards without needing any specialist knowledge. It also offers advanced customisation options should you require them.
It is available from the Settings menu in the Dashboard Editor.
You can also open it directly using the following link:
http://localhost:8080/digdash_dashboard/index-theme.jsp?domain=ddenterpriseapi
It is possible to create a bespoke base theme and then adapt it into several versions. For example, you could design a theme for the whole company, then create variants with different colour palettes for the Human Resources and Sales roles.
Prerequisites
You must have:
- the Dashboard > Dashboard Customisation permission.
- a dashboard to view changes in real time.
Create a new theme
When opened, the Theme Editor window appears as follows: no theme is selected.

To create a new theme:
- Click the Create button or the + button to the right of the Current Theme field.
➡ The New Theme dialogue box appears . - Enter the name of your choice, then select the base theme: None, a DigDash theme or another existing theme that you wish to customise. By default, your theme will use the same settings and will therefore have the same visual appearance.

- Click OK.
➡ The style settings and preview window will appear :- In the top banner, you’ll see the theme name and the base theme used.
- The style settings are grouped by category.
The ‘Additional CSS’ tab allows for advanced customisation for experienced users. - The preview window includes a tab containing your full dashboard, which you can navigate, and a tab dedicated to the login page.

- Modify the settings as required: see the section Modifying style settings for further details.
- Once you are satisfied with the result, click the Save button at the bottom right of the editor window.
Editing style settings
Style settings are grouped by category:
- Global: settings for fonts, banners and the dashboard background, as well as settings for the login page.
- Logos: images and settings for logos used throughout the dashboard.
- Navigation: settings for navigation menus (tabbed or vertical).
- Objects: settings for objects (chart containers, filters, comments, captions, etc.) and their titles.
- Content: settings for the content of objects, the access portal and collapsible objects.
- Other: list of custom variables.
You can add a custom variable by clicking the ‘Create variable’ button: then enter its name and value
- Additional CSS: CSS editor for adding custom CSS.
When you select a style setting, the affected elements are highlighted in the preview window: they are surrounded by a yellow dotted line.

If you then change the style setting, you can immediately see the visual result in the preview window.

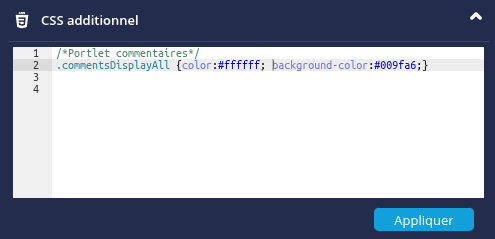
Adding additional CSS
The ‘Additional CSS’ tab contains a CSS editor for more advanced customisation.
It can be used if you wish to modify the styles for elements that cannot be edited in the interface, or for a specific element in a specific context:
 to maximise the editor.
- Enter the CSS and then click Apply: the result is immediately visible in the preview window.


Example: Customising styles for a group in an access portal
Where grouping is used (pages grouped by role, etc.) in an access portal, the styles for each group can be customised using the CSS selector #dd-tiles-menu-content-slider_groupname in the Additional CSS tab.
For example, below, we are modifying the styles of the tiles in theTools group by adding the following additional CSS:
#dd-tiles-menu-content-slider_Tools .dd-tile
{
background-color: #D5DFF0;
}
#dd-tiles-menu-content-slider_Tools .dd-tile-text
{
color: #000;
font-weight : bold;
}

Managing themes
Edit a theme
To edit an existing theme:
- Select the theme of your choice from the Current Theme drop-down list and edit it as required.
Duplicate a theme
To duplicate an existing theme:
- Select the theme of your choice from the Current Theme drop-down list.
- Click the Duplicate button
 and then name it as you wish.
Deleting a theme
To delete a theme:
- Select the theme of your choice from the Current Theme drop-down list.
- Click the Delete
 button.