
Data entry
- Preamble
- Configuring data entry
- Create a form
- Add a form to the dashboard
- Advanced configuration
- Using a form
- Using data from a form
- Security
Preamble
The purpose of data entry is to add new data via a form displayed on the dashboard.
The principle involves creating a form that automatically generates a table in a relational database such as MySQL, PostgreSQL, MariaDB, H2 or Oracle.
The data entered by the end user will be stored in this table; it will therefore be possible, via Studio, to create a data model based on this table.
Configuring data entry
To use this feature, you must configure it via the Server Settings > Databases >Data Entry.
This interface allows you to enable the feature and select the database in which the data entered will be stored.

You can select the default database, which is an H2 database. This database is not a production database, so we do not recommend using it.
Create a form
Once the feature has been enabled and configured, you can create one or more forms.
To do this:
- Log in to the dashboard editor and click on ‘Forms’ in the left-hand panel listing the items that can be added to the dashboard.
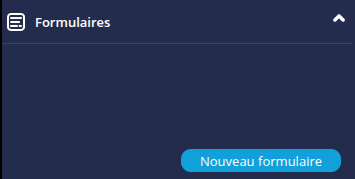
- Then click the New form button.
➡ The form creation interface will then appear.
Here is the form creation interface:
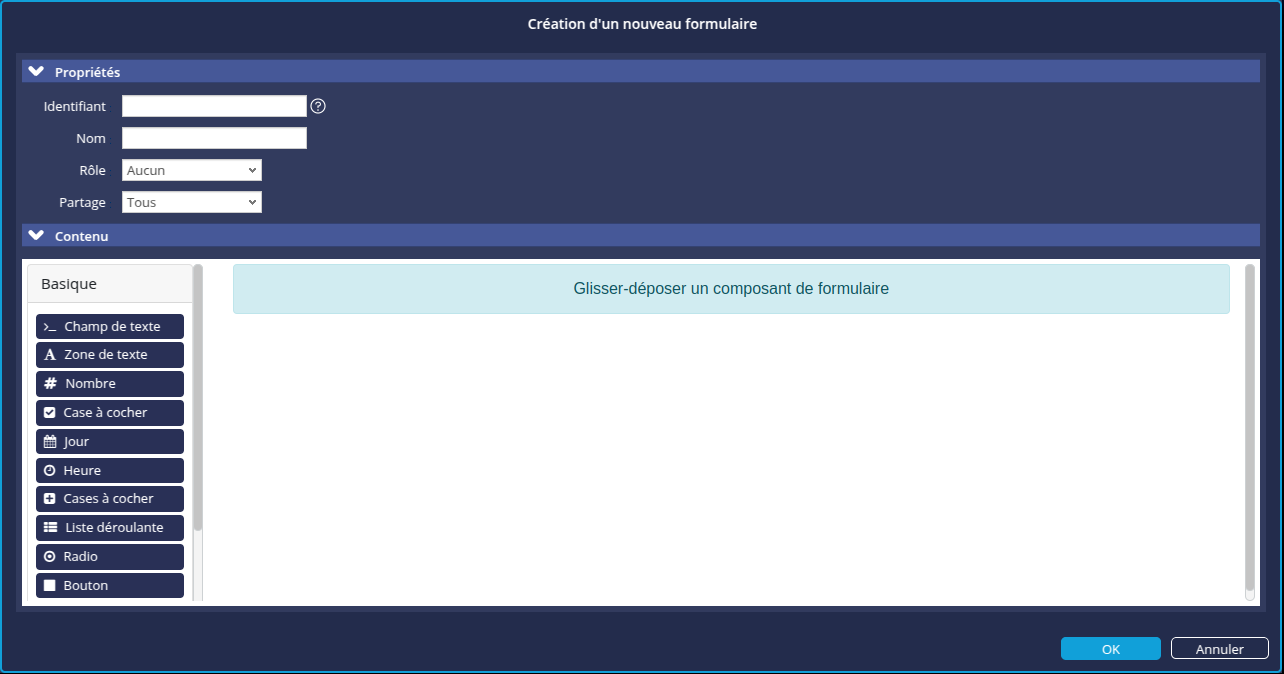
- In the Properties section, enterthe FormID: this corresponds to the name of the table created in the database. This ID must be unique and must contain only alphanumeric characters.
- Enter the Form Name : this corresponds to the name of the form displayed in the various interfaces.
- The Role field allows you to restrict access to the form to a specific role. See the section Securing a form for further details.
- The ‘Sharing’ field allows you to restrict access to the form to a user profile or define a custom sharing setting. See the section Securing a form for further details.
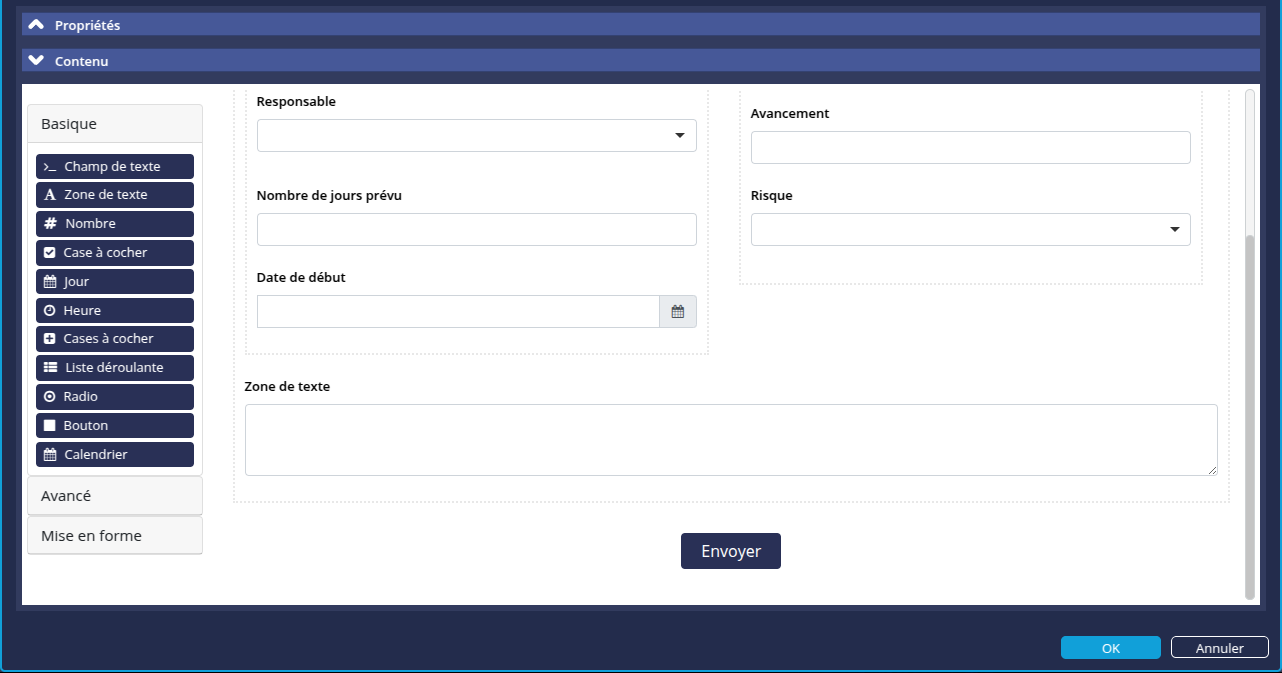
- In the Content section, define the form fields: drag and drop the required fields from the list of different field types (on the left) into the input form (on the right).
➡ For each field added, a field configuration window appears. See the section Configuring form fields below for further details.
- Once all the fields have been added to the form, you can save it by clicking OK at the bottom of the form.
➡ A table named after the form’s ID is created in the database.
You can edit, move, copy or delete a component using the toolbar that appears when you hover over the component with the mouse.
When you save the form, the table will be updated automatically. However, it is not possible to change a field’s data type (e.g. changing from a Date field to a Number field).
This table will contain all the fields present in the form, as well as the following columns:
- a unique identifier ( automatically incremented) enabling data to be edited (its name is id_form_id).
- dd_user: the ID of the user who added or modified the record
- creation_date: the date the data was created
- modification_date: the date the data was modified
Deleting a form will result in the deletion of the table and the data it contains.
Configuring form fields
When adding a field, a field configuration window appears. This interface has several tabs and allows you to configure both the field’s display and its behaviour within the form.
ThePreview section on the right allows you to preview how the form will look and to save the field’s configuration.
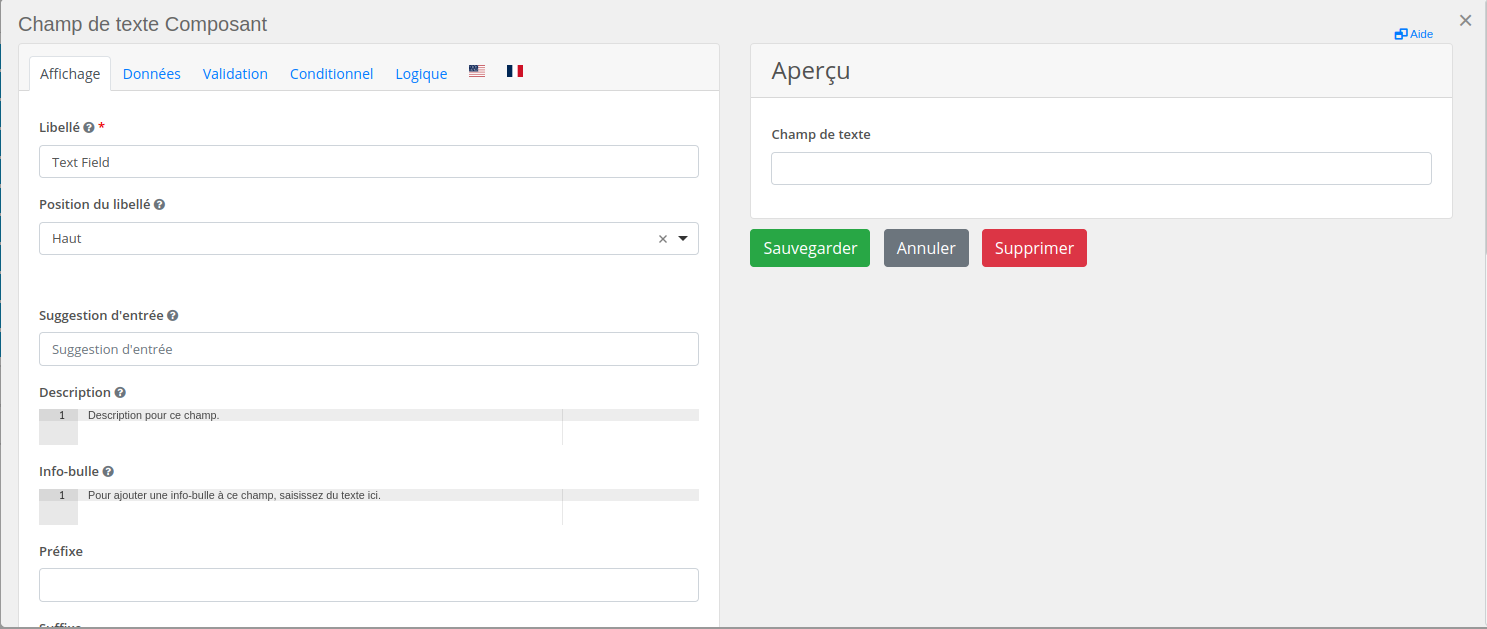
- The Display tab allows you to configure the visual appearance of the field.
It includes the following elements in particular:- Label: Choose the label to be displayed in the form (this will also be used as the name of the column in the data table).
- Input hint / Description: allows you to add a description or help text for this field to guide the user when entering data.
- Hidden: allows you to hide the field, which will therefore not be visible to the end user but will still be present in the form.
- The Data tab allows you to configure the data to be displayed for this field.
It includes the following elements in particular:- Default value: allows you to specify the default value for the form
- Values: allows you to specify the values from which the user can choose (for drop-down list fields, tick boxes, etc.)
- The Validation tab allows you to configure data validation for this field.
It includes the following options:- Required: allows you to make the field mandatory for the user. The form cannot be submitted whilst the field is empty.
- Unique: allows you to specify that the value of this field is unique and therefore cannot be entered more than once by the user. If this setting is enabled for several fields, it is the combination of all unique fields that must be unique. When the user edits the field, if its value already exists in the database, the form switches to edit mode and the other fields will be populated with the values stored in the database. In this case, the data submitted will overwrite the existing data.
- The Conditional tab allows you to make the display of this field conditional on the value of another field in the form.
- The Logictab allows you to carry out advanced configuration to conditionally control and manipulate field parameters, the JSON schema, data values and custom events. It is possible, for example, to secure a form field. See the section Security section for further details.
Configuring a ‘Save as Draft’ button
You can create a button that allows a form to be saved as a ‘draft’ even if not all fields – including those marked as mandatory – have been completed. To do this:
- Drag and drop a Button component onto the form.
➡ The button’s configuration window appears. - Edit the Label as required: for example, Save as draft.
- From the Action drop-down list, select Save to report.
- In the ‘Save to state ’ field that appears, enter ‘draft’.
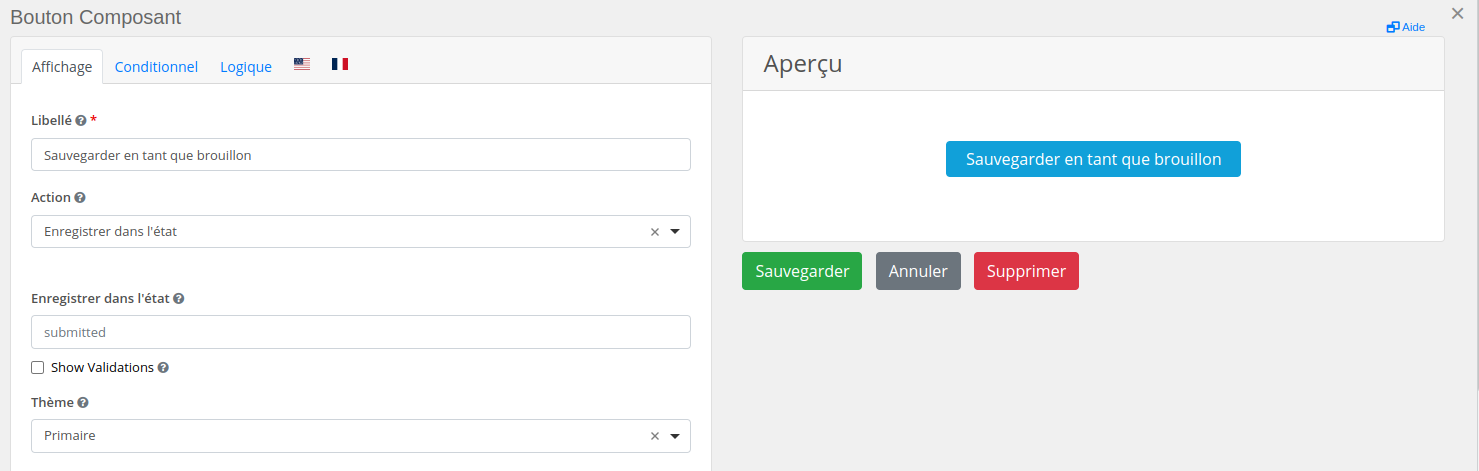
- Configure the other fields/options as required.
- Click Save to confirm the Button component’s configuration.
Configuring a drop-down list based on the number of items
When a drop-down list is linked to a dimension, the configuration varies depending on the number of members in the dimension.
- Drag and drop a Drop-down list component onto the form.
➡ The button configuration window appears. - Edit the Label as required: for example, City.
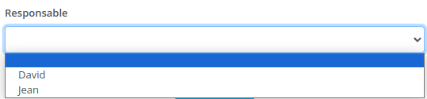
- Select the Widget Type:
- ChoicesJS is recommended for dimensions with a large number of items: it includes a search field for server-side searching.
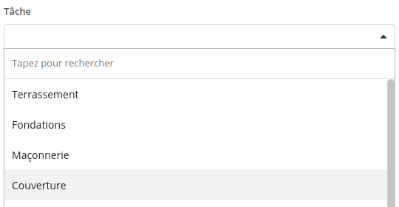
- HTML5 is recommended for dimensions with a small number of items: it does not include a search field and, where there are many items, the display may take a long time or the data may be incomplete.
- ChoicesJS is recommended for dimensions with a large number of items: it includes a search field for server-side searching.
- Configure the other fields/options as required.
- Click Save to confirm the configuration of the Drop-down List component.
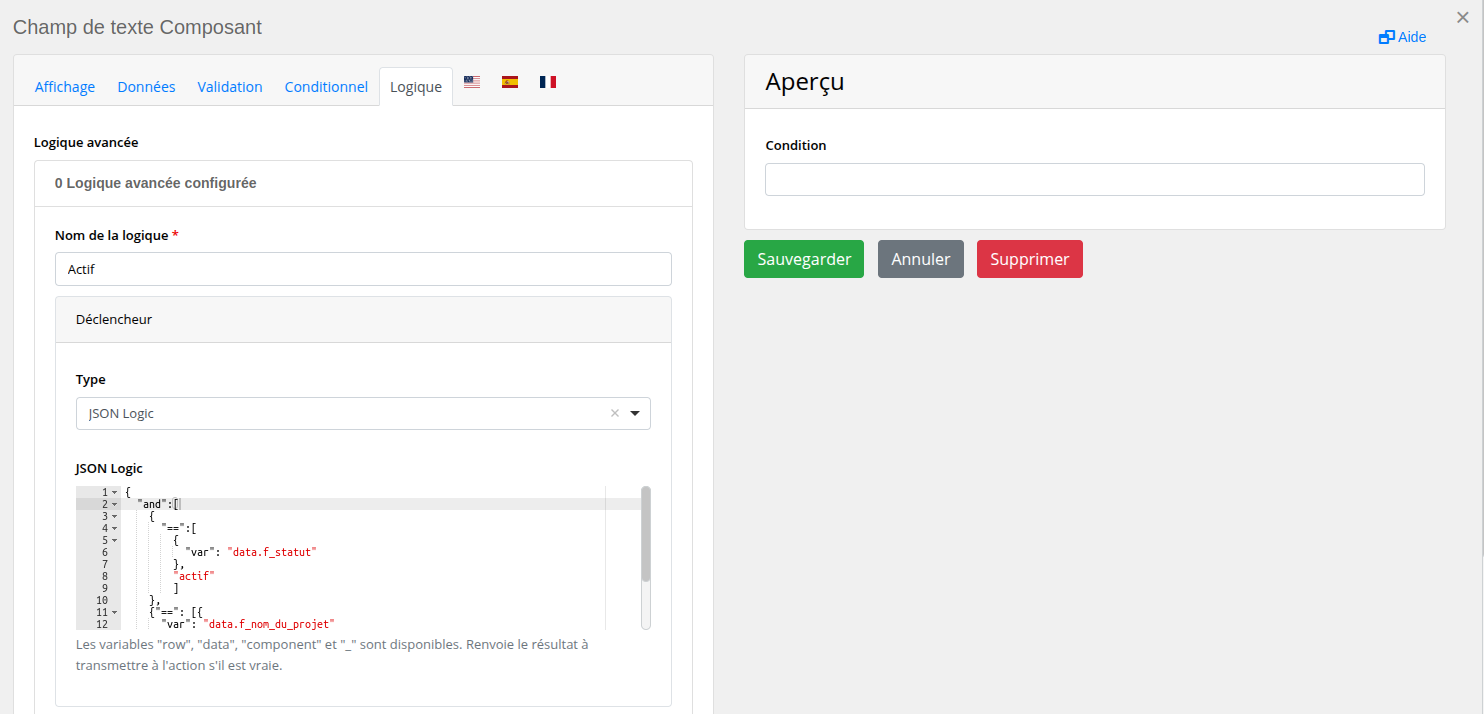
Configuring conditional display based on multiple values
It is possible to create a custom condition to automatically display a value based on other values.
For example, we have a form containing, amongst other things, aStatus field and a Project Name field. We want to display the value “Project in progress” in a text field when the status is “Active” and the project name is “Project1”. To do this:
- Add a text field to the form.
- In theComponent Text Field window that appears, edit the Label as required, then go to the Logic tab.
- Click theAdd Logic button to define the condition.
- Enter the Logic Name.
- In the Trigger field, select the JSON Logic type.
- In the JSON Logic editor, enter the following JSON code:
"and":[
{
"==":[
{
"var": "data.f_statut"
},
"actif"
]
},
{"==": [{
"var": "data.f_nom_du_projet"
},
"Projet1"
]
}
]
}
We then add the action to be performed when the condition defined below is met:
- In the Actions section, click the Add an action button.
- Enter the Name of the action.
- Select the Value type.
- In the JavaScript editor, enter the value to be displayed in the following format:
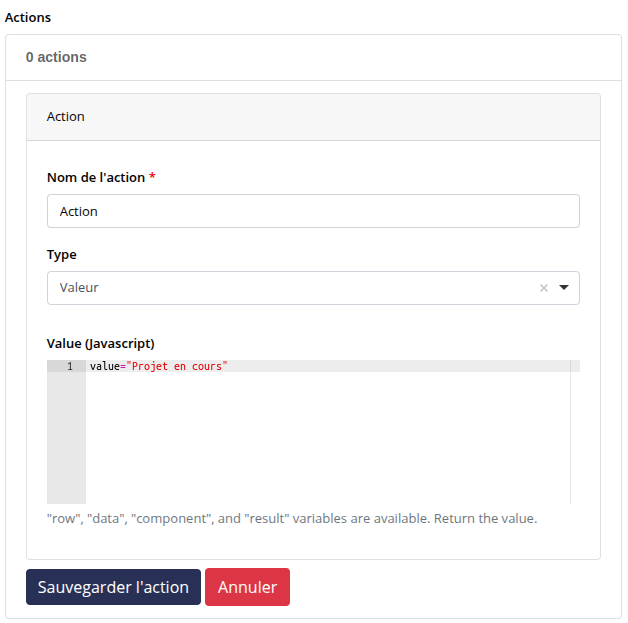
- Click the Save actionbutton, then Save logic.
- Finally, save the field.
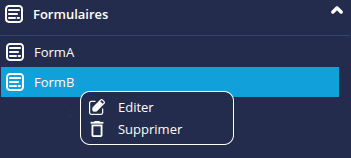
Edit / Delete a form
To edit or delete a form, right-click on the form in the Forms section of the left-hand panel, then click Edit or Delete.
Add a form to the dashboard
The next step is to add the form to a dashboard page. To do this, simply drag and drop the newly created form onto the dashboard page.
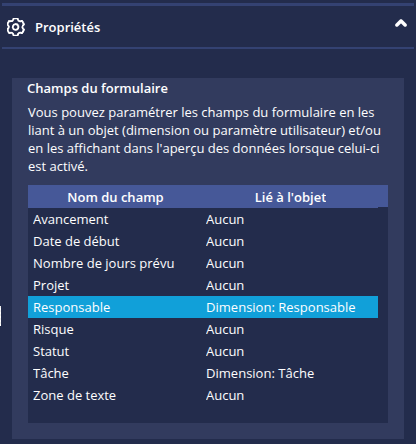
Form objects are configured via the Settings -> Properties menu.
Linking a field to data
It is possible to link a form field to data present on the dashboard. Two types of link are possible:
- a link to a dimension on the dashboard page. This automatically populates the field’s value when that dimension is filtered. It also populates the field’s values with the members of the dimension for selection fields (drop-down lists, tick boxes, etc.).
- a link to a user parameter. This automatically populates the field’s value with the value of the logged-in user’s parameter. This can be useful for survey-type forms to record which user completed the form.
To do this:
- Click ‘None’ to the right of the name of the field you wish to link.
➡ The ‘Link’ box appears . - Select the Link type, then the Dimension or User attribute to link.
- Click OK.
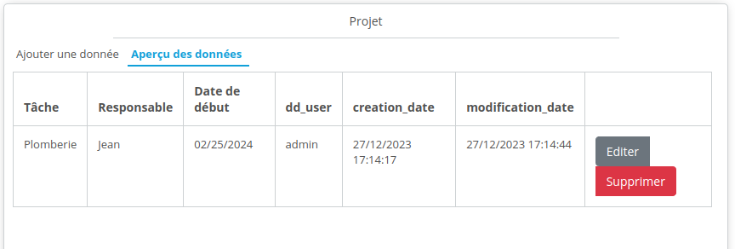
View a preview of the data
The ‘Preview data’ option allows you to view a preview of the data exactly as it is stored in the database, whilst selecting which fields to display (a ‘Display’ column is added for the form fields). This interface also allows you to manage the data by enabling you to edit or delete a data entry.
Configure an action
Advanced configuration
Configuring an action before form submission
It is possible to automatically perform certain actions on the information entered before a form is submitted by adding a JavaScript listener.
This allows you, in particular, to standardise the data (formatting, normalisation) or to manage custom business states, independently of the form’s native technical states.
Configuration is carried out in the JavaScript editor:
- In the user menu, select Settings then JavaScript Editor.
- Add the function “ddCtrl.addFormBeforeSubmitListener”, which will be triggered before the form data is submitted, in the following format:ddCtrl.addFormBeforeSubmitListener(function(formId, formSubmission) {
// Logique de traitement
});
This function has two parameters:
- formId: the form ID
- formSubmission: the form data.
The formSubmission object contains several elements:
- data: the form data in key/value format, where the key is the field ID and the value is the value entered in the field.
- metadata: form metadata such as the form ID (formId), the page ID (pageId), the role ID (roleId), the portlet ID (portletId), etc.
- state: several possible values: “submitted” (data submitted), “draft” (submitted as a draft)
The action can be applied to the form data (“data” elements).
The “metadata” and “state” elements can be used in processing conditions.
To illustrate the function simply, in the example below, when the form with the ID “Patient” is submitted, the name entered in the “Name” field (key f_name) is automatically capitalised before submission.
{
if (formId == "Patient")
{
formSubmission.data.f_nom = formSubmission.data.f_nom.toUpperCase(); //Met en majuscule le champ f_nom du formulaire
}
});
Example: managing custom states
Forms have two native technical states:
- submitted: allows a form to be submitted once all required fields have been completed;
- draft: allows the form to be saved as a draft, without full validation.
In certain contexts, it may be necessary to manage additional statuses, for example: closed or cancelled. In this case, we will use a custom status stored in the form data via a dedicated field (for example, Status). This status does not alter the technical behaviour of form submission but enables the management of the form’s business lifecycle.
Let’s take the example of a “Registration” form comprising:
- several fields (including at least one mandatory field),
- three buttons: Submit, Draft and Close,
- a Status field (f_statut) used to manage the different statuses, which can be hidden from the user.

To ensure the form is in the desired state depending on which button is clicked, we use the following JavaScript code:
ddCtrl.addFormBeforeSubmitListener(function(formId, formSubmission){
// Ici on récupère l'identifiant du formulaire pour s'assurer de traiter celui voulu
if (formId == "Inscription")
{
// On vérifie ici le type de bouton cliqué pour connaître l'état personnalisé que je souhaite traiter
if (formSubmission.data["f_submit"] == true){ // Clic sur le bouton "Envoyer"
formSubmission.data["f_statut"] = "submit";
formSubmission.state = "submitted";
}
if (formSubmission.data["f_brouillon"] == true){ // Clic sur le bouton "Brouillon"
formSubmission.data["f_statut"] = "draft";
formSubmission.state = "draft";
}
if (formSubmission.data["f_fermer"] == true){ // Clic sur le bouton "Fermer"
formSubmission.data["f_statut"] = "closed";
}
// On ajoute autant de bloc "if" qu'on a de statuts à gérer dans le formulaire
}
});
So, in this example:
- The “Submit” button sets the form to “submitted”.
- The “Draft” button allows you to save a partial version (draft) without validating all the required fields.
- The “Close” button simply marks the form as closed from a functional point of view, even if required fields have not been filled in.
Configuring an email to be sent upon form submission
It is possible to configure the system to send an email when a form is submitted.
Prerequisites
- The email server must be configured.
- The user must have the ‘Dashboard -> Send an email’ permission.
Configuration
Configuration is carried out in the JavaScript editor:
- In the user menu, select Settings then JavaScript Editor.
- Add the function “ddCtrl.addFormSubmitListener”, which will be triggered once the form has been submitted (after it has been sent to the server), in the following format:
{
if (formId == "Identifiant du formulaire")
{
var message = "Contenu du message";
var res = ddCtrl.sendMail ("destinataires (séparés par des virgules)", "sujet du mail", message);
}
});
The message can contain the values of the fields entered by the user via the “formSubmission.data” object in the following format:formSubmission.data.f_field_name.
Example
We have a survey form with the ID ‘Survey ’ containing the fields ‘User ’ and ‘Tool’. We wish to send an email to recipients with the information entered for these fields in the message body.
{
if (formId == "Sondage")
{
var message = "L'utilisateur '" + formSubmission.data.f_utilisateur + "' a répondu '" + formSubmission.data.f_outil + "' au sondage Outil préféré.";
var res = ddCtrl.sendMail("jean.dupont@mail.com,jean.dupond@mail.com", "Sondage", message);
}
});
Upon submission of the form, with ‘Jean’ entered in the ‘User’ field and ‘DigDash’ in the ‘Tool’ field, the recipients will receive an email with the subject line ‘Survey’ and the following message:The user ‘Jean’ answered ‘DigDash’ in the ‘Favourite BI Tool’ survey.
Using a form
Once the ‘Form’ object has been added and configured on the dashboard page, and the page has been saved, the form becomes accessible to users who have access to this page and who have the ‘Dashboard > Add data via a form’ permission.
Once the user has entered the data, it is automatically saved to the database. If a data source refresh is configured, the new data is imported into DigDash and will therefore be available on the dashboard.
It is also possible to display the form as a pop-up, using the `openFormInWindow` function, which can be configured at chart level; details of this function are available in the documentation JavaScript functions.
Using data from a form
Once the form has been created, the data table is created in the database, so this data can be utilised by DigDash.
To do this, simply use Studio to create a data model based on the newly created SQL table by selecting the database chosen to store the form data. As a reminder, the table name is the form ID entered by the user.
If the table is stored in our embedded H2 database, here are the login credentials required to access it:
identifiants : sa/sa
Once the data model has been created, you can then generate charts from it.
Security
Securing a form
To secure a form, you can associate it with a role. Only users with the defined role will be able to access the form. To do this, select the role to which the form is associated from the Role drop-down list.
If you wish to make the form visible to all roles, select None.
It is also possible to restrict access to a form based on a user profile or via custom sharing. To do this, select one of the options from the Sharing drop-down list:
- All: all users will have access to the form.
- User profile: if user profiles are available, you can select a user profile to restrict access to the form to. Only users with that user profile will have access to the form.
- Custom: you can define a custom sharing setting using JSON Logic. To do this, click the
 and enter the required JSON Logic in the Custom Sharing interface. For example, to restrict access to the form to users with the user profile ‘profile_A’ or ‘profile_B’, use:
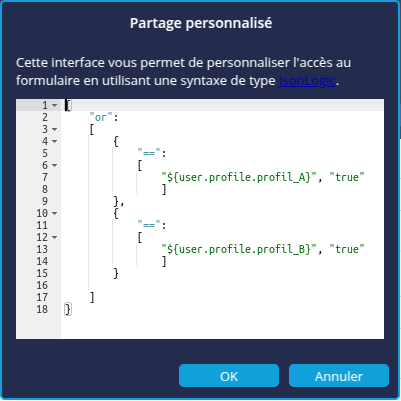
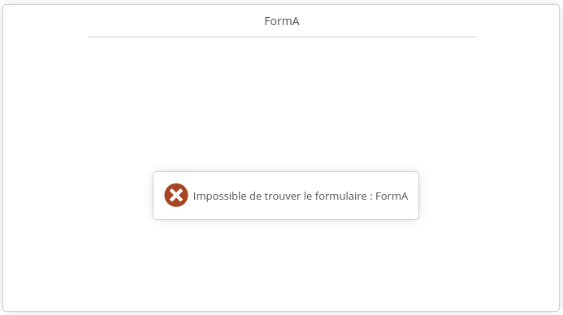
When a user does not have access to a form:
- the form no longer appears in the Forms list in the dashboard editor.
- if the form is added to a dashboard page, an error is displayed:
Securing a form field
Based on a user profile or a user setting
It is possible to restrict access to a form field based on a user profile or a user setting.
To do this, configure a logic rule in the Logic tab of the component’s edit window.
To check whether the user has the specified profile, a profile can be used in the form ${user.profile.profilename} in the JSON Logic. This keyword returns a value of “true” or “false”.
To check the parameter of the logged-in user, a user parameter can be used in the form ${user.myparam} in the JSON Logic.
- Enter the Name of the logic.
- In the Trigger section, select the JSON Logic type.
- Enter the JSON Logic code. For example:
"==": [
"${user.profile.profil_A}",
"true"
]
}
In this example, the trigger is activated if the user has the profil_A profile .
- Then define the action to be performed when the trigger is activated.
In this example, if the trigger is activated, the “Disabled” property is set to “True”. The form field is then read-only.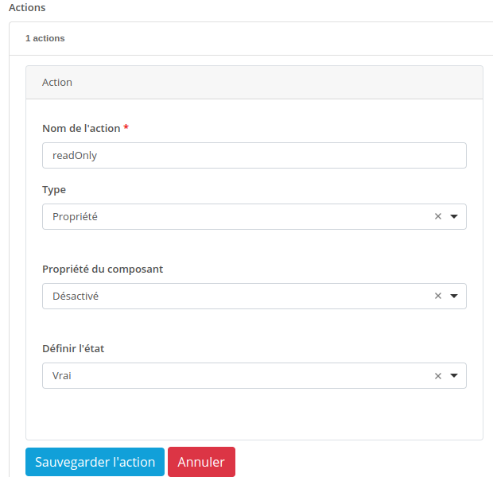
- Click Save action and then Save logic.
Depending on the data
It is possible to secure a form field based on the value of a dimension or measure retrieved from a data stream (chart) or a data model.
To do this, follow the same procedure as in the previous section, but use JSON Logic code that references the stream or data model ID, filters, and a dimension or measure to define the trigger.
Example of JSON Logic based on a flow (chart):
"==":
[
"${cube.value({\"flowId\":\"b312f6be\",\"filters\":[{\"dim\": \"Matériel\", \"member\":\"Samsung Galaxy\"}],\"res\":\"Type de ligne\"})}",
"Mobile"
]
}
where:
- flowId: the identifier of the flow from which the desired data will be retrieved.
- filters: filters to be applied to the chart so that only one row of data is returned by the server.
- res: the dimension or measure of the value to be retrieved.
If the value returned by "${cube.value({\"flowId\":\"b312f6be\",\"filters\":[{\"dim\": \"Hardware\", \"member\":\"Samsung Galaxy\"}],\"res\":\"Line type\"})}" is equal to the desired value "Mobile", then the action is triggered.
Example of JSON Logic based on a data model:
"==":
[
"${cube.value({\"dmId\":\"0b2583609f86d37754ce2ada372f31ae\",\"filters\":[{\"dim\": \"Matériel\", \"member\":\"Samsung Galaxy\"}],\"res\":\"Type de ligne\"})}",
"Mobile"
]
}
where:
- dmId: identifier of the data model from which the desired data will be retrieved.
- filters: filters to be applied to the data model so that only one row of data is returned by the server.
- res: the dimension or measure of the value to be retrieved.
If the value returned by "${cube.value({\"dmId\":\"0b2583609f86d37754ce2ada372f31ae\",\"filters\":[{\"dim\": \"Hardware\", \"member\":\"Samsung Galaxy\"}],\"res\":\"Row type\"})}" is equal to the desired value "Mobile", then the action is triggered.