Connector Splunk
- Prerequisite
- Selecting a new datasource
- Authentication
- Listing all Splunk indexes
- Splunk search text field
Prerequisite
- A Splunk server with identifiers (see next point)
Selecting a new datasource
DigDash Enterprise allows you to retrieve information from your Splunk account.
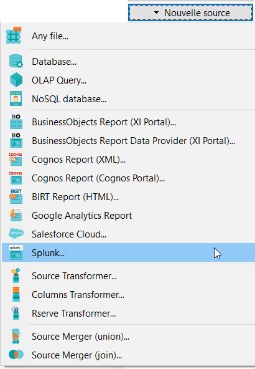
Select the type of report you want to work with, in the toolbar at the bottom of the page.


OR click on New model in the datasource manager tab and choose Splunk....


Authentication

Screenshot: Interface for authentication and loading Splunk indexes
DigDash requires the following information to connect to your Splunk account:
- Server URL: it is your Splunk server URL as <protocol>://<host>:<port>
- User: it is your Splunk user name
- Password: it is your Splunk password
Listing all Splunk indexes
A drop-down list in the User Interface allows you to have all available Splunk indexes of your server once authenticated.

Screenshot: Drop-down list displaying all Splunk indexes after authentication
Splunk search text field
You can retrieve Splunk information using command lines.

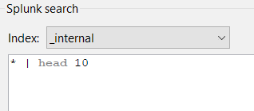
Screenshot: Splunk search text field
The syntax for CLI (command lines) searches is similar to the syntax for searches you run from Splunk Web.
http://docs.splunk.com/Documentation/SplunkCloud/latest/SearchReference/CLIsearchsyntax
But some peculiarities must be taken into account.
Search command
Splunk search strings absolutely have to start with the search command. Yet, you can choose to omit it, DigDash takes it into account in your search string implicitly.
Example :
Entering the search string
« index=_internal * | head 10 »
is the same as
« search index=_internal * | head 10 »
Index selection
Selecting an index automatically inserts the filter : « index=<index-name> » into your search string after the search command.
Examples : Let’s consider the index « _internal » is selected in the list.

Screenshot : the index « _internal » is selected
1/ Entering the search string
« * | head 10 »
is the same as
« search index=_internal * | head 10 »
2/ Entering the search string
« search * | head 10 »
is the same as
« search index=_internal * | head 10 »
If no index is selected, you may directly mention an index name in your search string.
Example : Let’s consider no index is selected from the index list.

Screenshot : No index is selected
Entering the search string
« index=_internal * | head 10 »
is the same as
« search index=_internal * | head 10 »
Time ranges
Just as Splunk Web, you can specify a static period of time to get data related to this time range, mentioning two filters: earliest and latest.
If none of these filters are mentioned in your search string, the filters earliest=-1h and latest=now will be taken into account.
You can specify two types of time ranges:
- Absolute time ranges: an absolute time range uses specific dates and times, for example, from 12 A.M. November 1, 2017 to 12 A.M. November 13, 2017.
- Relative time ranges: a relative time range is dependent on when the search is run. For example, a relative time range of -60m means 60 minutes ago. If the current time is 3 P.M., the search returns events from the last 60 minutes, or 2 P.M. to 3 P.M. today.
The different syntaxes are available in the official Splunk documentation:
https://docs.splunk.com/Documentation/Splunk/7.1.2/Search/Specifytimemodifiersinyoursearch
| Entered values | Valeurs taken into account | ||
| earliest | latest | earliest | latest |
| 10/19/2017:0:0:0 | 10/27/2017:0:0:0 | 10/19/2017:0:0:0 | 10/27/2017:0:0:0 |
| 10/19/2017:0:0:0 | Ø | 10/19/2017:0:0:0 | now |
| Ø | Ø | -1h | now |
Table: dates taken into account for Splunk searches
Maximum number of results
By default, and for speed matter, the maximum number of results returned by a Splunk search is 10,000.You can change this number by mentioning the operation “head <integer>” in your search string.
Example: entering the search string “search index=_internal | head 10” will return the first 10 results of the Splunk search.